How to Renovate Old Houses A Practical Guide
Learn how to renovate old houses with our expert guide. We cover everything from realistic budgeting and permits to hiring pros and avoiding costly mistakes.
Posted by
So, you’re thinking about renovating an old house. It’s a journey I know well, and it’s one that’s incredibly rewarding. But let’s be honest: it’s a lot more than a fresh coat of paint and some new curtains. The real work begins long before you pick up a hammer. It all starts with a cold, hard look at the home’s structure, followed by meticulous planning and budgeting.
Your success hinges on one thing: understanding the property's unique challenges before you get started. This mindset will help you create a realistic plan that honors the home's original character without breaking the bank.
What Renovating an Old House Really Takes
Bringing an old house back to its former glory is a special kind of project. There’s a certain magic to it. These homes have a soul, a history, and a level of craftsmanship you just don't find in modern construction. Plus, there's a real satisfaction in restoring something beautiful instead of building new. This isn't just a niche hobby, either; the global home remodeling market was valued at around USD 950 billion in 2023 and is only expected to grow as more older homes need love.
But for all the romance, you have to be prepared for the reality. Old houses are notorious for hiding secrets.
Understanding The Core Challenges
Before you even think about design, you need to become a detective. From my experience, here are the big three issues you’re likely to encounter:
- Hidden Structural Issues: That charmingly uneven floor might be a sign of a sagging foundation. Those beautiful old beams? They could be hiding termite damage or rot. You have to look past the surface.
- Outdated Systems: This is a big one. Old wiring is often a fire hazard, and galvanized plumbing can be on its last legs. Expect to bring both electrical and plumbing up to modern safety codes, which usually means a complete replacement.
- Hazardous Materials: Homes built before the 1980s are often full of things we now know are dangerous, like asbestos insulation and lead paint. Dealing with these requires certified professionals and adds a significant cost to the project.
This image breaks down the typical workflow for a major renovation. It’s a roadmap that helps you see how one phase logically flows into the next.
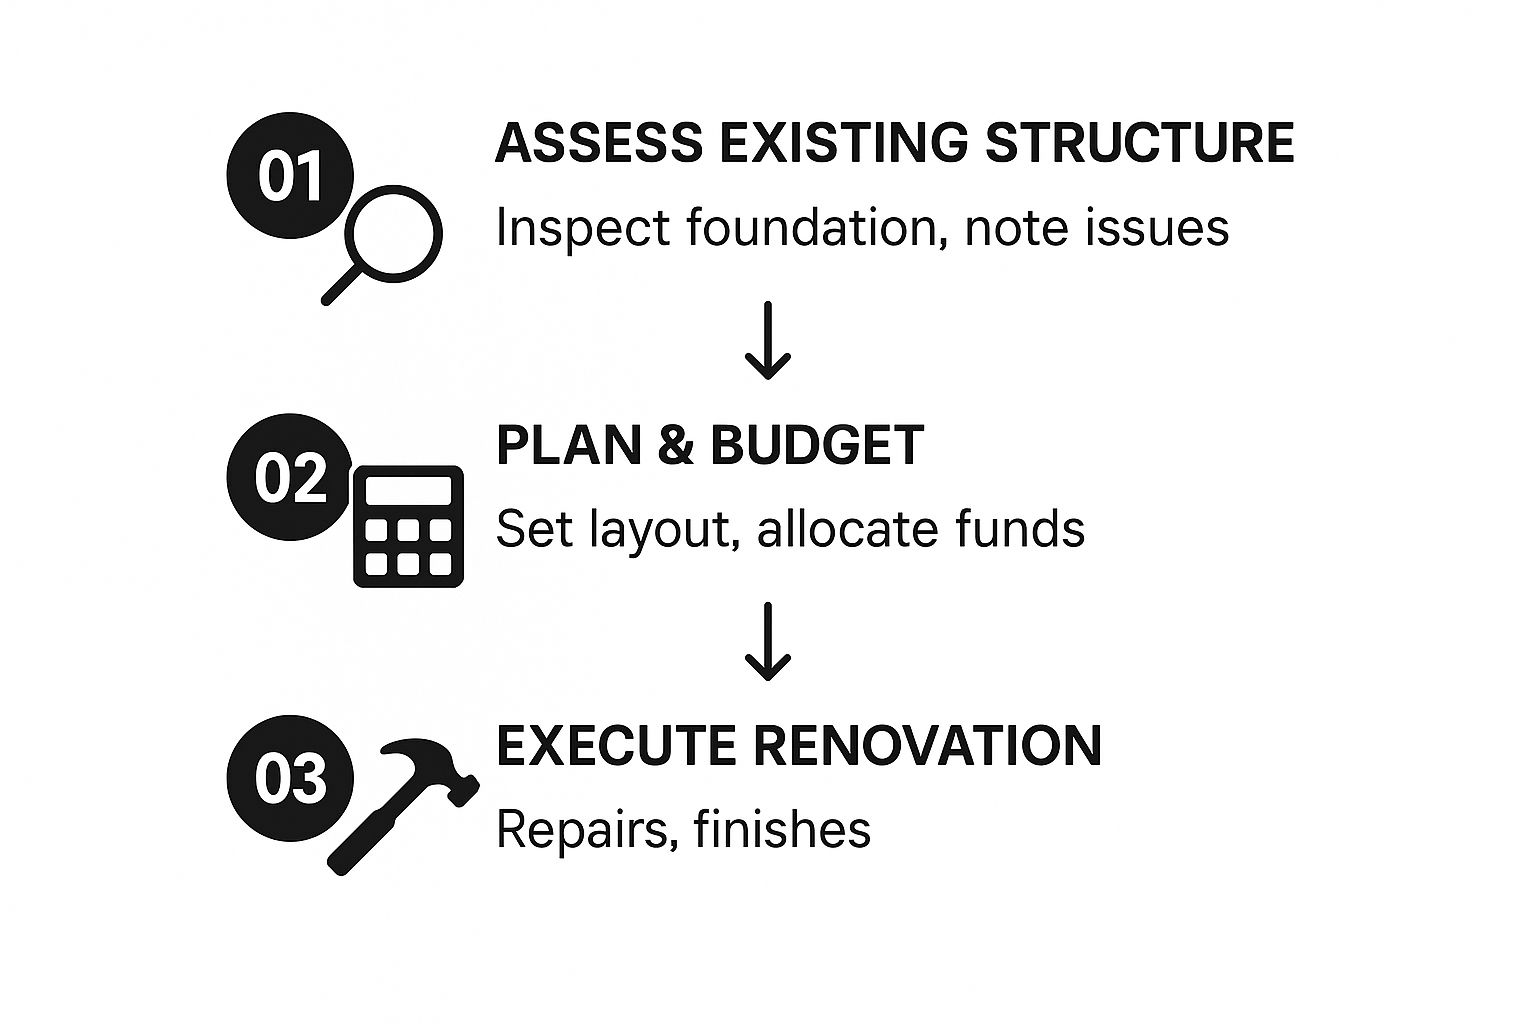
As you can see, the project is a sequence. The information you gather in the assessment phase is what you'll use to build your budget. Skip that first step, and you’re just guessing—which is a recipe for disaster.
The most successful old house renovations are built on a foundation of honest assessment and meticulous planning. Overlooking the initial inspection phase is the single biggest mistake you can make, turning a dream project into a financial nightmare.
Taking on an old home means you have to embrace both its charm and its chaos. The hurdles might seem intimidating, but a well-structured plan turns a mountain into a series of manageable hills. This passion for restoration is worldwide; you can even find unique opportunities if you know how to find a cheap home in Japan, where many historic "akiyas" are waiting for a new life.
To give you a clearer picture, I've broken down the entire process into its essential stages. Think of this as your project's lifecycle, from initial idea to final walkthrough.
Key Phases of an Old House Renovation
| Phase | Primary Goal | Key Activities |
|---|---|---|
| 1. Assessment & Vision | Understand the home's condition & define goals | Structural inspections, system checks (plumbing, electrical), hazardous material testing, creating a wishlist. |
| 2. Planning & Design | Create a detailed, actionable blueprint | Hiring professionals (architect, contractor), creating architectural plans, finalizing layouts and finishes. |
| 3. Budget & Permits | Secure funding and legal approval | Getting contractor bids, finalizing the budget, submitting plans to the local building department. |
| 4. Demolition & Prep | Prepare the site for new construction | Tearing out old materials, safe removal of hazardous substances, structural repairs and reinforcement. |
| 5. The "Rough-In" | Install the home's core systems | Running new electrical wiring, installing plumbing and HVAC ductwork, framing new walls. |
| 6. Finishing | Bring the visual design to life | Installing drywall, painting, laying flooring, setting cabinets and fixtures, tiling. |
| 7. Final Touches | Complete the project and move in | Final inspections, punch list with the contractor, landscaping, and final cleaning. |
Following these phases in order is the key. Each one builds on the last, creating a logical progression that minimizes surprises and helps keep your project on track and on budget.
Performing Your Pre-Renovation Inspection

Before you even think about new kitchens or paint swatches, you have to get your hands dirty. An honest, unflinching inspection is the bedrock of any successful old house renovation. This isn't just a casual walkthrough; it’s a forensic investigation into the home’s history and health.
What you find—or fail to find—at this stage will dictate your budget, your schedule, and whether your project ends in triumph or frustration. Consider this your roadmap to avoiding the most common and costly pitfalls.
Start With the Bones: Structure and Envelope
First things first: you need to assess the very things that hold the house up. Structural problems are almost always the most expensive to remedy, so you need to look for them with a critical eye right from the start.
Begin outside. Where does the water go when it rains? Walk the perimeter and check the grading. If the ground slopes toward the house, you're looking at a recipe for foundation trouble. Head into the basement or crawlspace and hunt for signs of that pressure. Long horizontal cracks or stair-step cracks in the foundation walls are major red flags that scream "structural issue."
Now, look up. You don't need to be a roofer to spot obvious trouble. From the ground, look for:
- Curling or missing shingles: A clear sign the roof is on its last legs.
- Noticeable sagging: Any dip in the roofline can point to bigger problems underneath, like rotted sheathing or compromised rafters.
- Damaged flashing: Check the metal seals around chimneys and vents. If they're rusted or pulling away, water is getting in.
While you're at it, keep an eye out for unwanted tenants. Mud tubes running up the foundation are the telltale highways of termites. Fine, sawdust-like piles (called "frass") beneath wooden beams can signal an active infestation of carpenter ants or powderpost beetles.
Evaluating the Core Systems
With the structure assessed, it’s time to move on to the home’s circulatory and nervous systems: the HVAC, plumbing, and electrical. In an old home, these systems have often been patched together over decades and can pose serious safety risks.
An old home’s plumbing, electrical, and HVAC systems are its central nervous system. Expecting them to work flawlessly after 50+ years is unrealistic and often dangerous. Budgeting for system-wide upgrades from the start is a wise move, not a worst-case scenario.
Take a hard look at the electrical panel. Many older homes still run on outdated knob-and-tube wiring or have ungrounded two-prong outlets—both are significant fire hazards and simply can't support our modern, device-heavy lives. Today, a 2,000-square-foot home typically requires a 200-amp service; you might find an old house struggling with a 60 or 100-amp panel. An audit from a qualified electrician is non-negotiable.
Next, the plumbing. Look for galvanized steel pipes, which are notorious for rusting from the inside out. This leads to poor water pressure and, eventually, pinhole leaks that can cause thousands in water damage. Dark water stains on ceilings or under sinks are the ghosts of leaks past—or warnings of leaks present.
Finally, check the HVAC. If the furnace or air conditioner is over 15 years old, it's running on borrowed time and wasting energy. Many units manufactured before 2010 also use R-22 refrigerant (Freon), which has been phased out. Servicing these units is becoming incredibly expensive, making replacement a much smarter investment.
Identifying Hazardous Materials
Homes built before the 1980s are often a minefield of hazardous materials. Finding them before you start swinging a hammer is critical for the safety of your family and crew.
Be on the lookout for asbestos, which was commonly used in vinyl floor tiles, "popcorn" ceilings, pipe insulation, and siding. Lead paint is another major concern in any home built before 1978 and can be found on everything from trim and windows to old layers of wall paint.
Do not try to handle these materials yourself. They require professional testing and abatement by certified specialists. Getting this wrong can have serious health consequences and lead to massive cleanup costs. This initial inspection is your chance to get ahead of the surprises, turning potential disasters into manageable line items on your project plan.
Building a Realistic Renovation Budget
You’ve done the hard work of assessing the house, so you’re no longer flying blind. Now it's time to translate all those inspection notes into a solid financial roadmap. A real-world budget is so much more than a spreadsheet of numbers—it's the tool that keeps your vision grounded in reality and prevents your project from spiraling out of control.
It all starts with a detailed scope of work. This is where you get brutally honest about what absolutely must be done versus what you'd like to do. I always tell my clients to create two columns: "Needs" and "Wants." This simple act of prioritization is your best defense against budget creep later on.
For example, your inspection might have red-flagged a leaky foundation. That goes straight into the "Needs" column. The custom-built-ins for the den you've been dreaming of? That’s a "Want." It can wait if the foundation repair uncovers more extensive (and expensive) issues. This process keeps you focused on the home's core health and safety first.
Securing Accurate Contractor Quotes
With a clear scope in hand, you're ready to talk to contractors. Here's a pro tip: never, ever accept a single, lump-sum estimate. It tells you almost nothing.
Instead, insist on an itemized bid from every contractor. This means they need to break down the costs for both labor and materials for each major phase of the project—think framing, plumbing, electrical, drywall, and so on.
This approach is powerful for two reasons:
- It lets you compare bids accurately. You can see precisely why one contractor's price is higher than another's.
- It gives you control. If you need to cut costs, you know exactly where your money is going and can make strategic adjustments rather than slashing blindly.
You might discover one contractor’s bid for tile work is double another's, which gives you a specific point to negotiate or a clear reason to choose someone else. While the hands-on work of renovating is universal, financial approaches can vary by location. For example, the process of buying a house in Japan as a foreigner often comes with its own unique budgeting challenges for older homes, known as akiya.
The Non-Negotiable Contingency Fund
I can't stress this enough: old houses are full of surprises. No matter how meticulously you plan, something unexpected will happen. This is why a contingency fund isn't just a suggestion; it's a mandatory part of any realistic renovation budget.
We're not talking about a few extra hundred dollars. You need to set aside an additional 15-20% of your total estimated project cost specifically for these unknowns.
Real-world scenario: You open a wall to move an outlet and discover the entire wall cavity is riddled with termite damage. Or the plumber discovers the main sewer line under the slab is cracked. Without a contingency fund, these common discoveries can derail your project entirely or force you to take on debt. It’s your project’s insurance policy.
This is especially critical for older properties. Statistics show that owners of homes built before 1940 spend roughly 50% more on renovations and repairs than owners of homes built after 2010. Much of this cost comes from bringing outdated electrical and plumbing up to modern code and improving abysmal energy efficiency.
By creating a detailed scope, demanding itemized quotes, and funding a robust contingency, you build a budget that's resilient enough for the realities of an old-home renovation. This financial groundwork is what will ultimately carry your project from a dream to a successfully completed home.
Building Your Team and Navigating Permits
A successful old house renovation really comes down to two things: the right people and the right paperwork. Get one of these wrong, and you're setting yourself up for a world of headaches and unexpected costs. The crew you hire is easily the biggest decision you'll make, impacting everything from the quality of the work to how long it takes to finally move in.
When you're dealing with an old house, you can't just hire any crew. These homes have their own personalities and quirks. A general contractor who's used to new construction might be stumped by sagging floor joists or plaster walls that crumble at the slightest touch. You need people who actually get old homes—who know how to blend modern updates with the original character, not just bulldoze over it.
Assembling Your Renovation Dream Team
The first thing you need to do is find professionals who have real, hands-on experience with older properties. Don't be shy about it. Ask to see a portfolio, and make sure it includes homes from a similar era and style as yours.
When you start interviewing, here’s who you’re looking for:
- General Contractor: This person is the captain of your ship. You need someone who communicates clearly, provides a transparent bid, and has a trail of happy clients with projects just like yours.
- Architect or Designer: If you're planning to move walls or significantly change the layout, an architect is essential. They'll help you create a space that’s both functional and honors the home’s original spirit.
- Structural Engineer: This is non-negotiable. If your inspection flagged foundation problems, sagging floors, or you’re thinking about taking down a load-bearing wall, you absolutely need an engineer to sign off.
A critical piece of advice: Never, ever hire someone who isn't properly insured. Confirm that every single professional has both liability insurance and workers' compensation. Ask for proof and actually call the insurance company to make sure the policies are active. This is the one thing that protects you from financial disaster if an accident happens on your property.
Before you sign on the dotted line, read the contract until your eyes hurt. It needs to be incredibly detailed, spelling out the scope of work, a payment schedule, a projected timeline, and exactly how changes will be handled. A vague contract is just asking for a fight down the road. While local rules vary, the need for this kind of thorough due diligence is universal. You can find more on this topic in our guide covering what to ask before buying a home in Japan.
How to Handle Building Permits
I know, the permit process seems like a huge pain. But trust me, it’s there to protect you. Think of permits less as red tape and more as a crucial safety net that ensures all the work done on your home is up to code.
You'll almost certainly need a permit for anything more than painting or changing a light fixture. Moving walls, messing with plumbing, or upgrading the electrical system? All of these require permits. Your architect or contractor will submit the plans, and the local building department will review them to make sure everything is safe and compliant.
Skipping the permit process is a gamble you don't want to take. The consequences can be severe: hefty fines, being forced to rip out finished work, and major complications when you decide to sell the house. A properly permitted renovation, on the other hand, creates a legal record that the work was inspected and approved, which is invaluable for your safety and your home's future value.
Bringing the Vision to Life: The Construction Phase
After all the planning and paperwork, this is where the real work begins. The construction phase is when your vision for the old house finally starts taking shape, nail by nail and board by board. It can feel a bit chaotic, but there's a definite logic to the sequence of events. Knowing that sequence is your best tool for keeping the project on track.
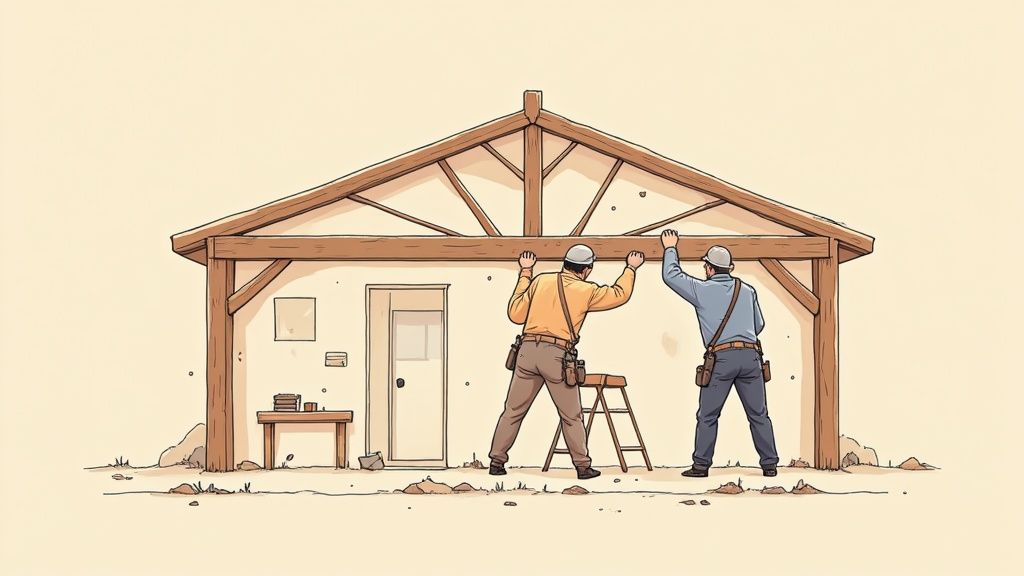
First comes demolition. Your crew will strip the house back, often right down to the studs. This is immediately followed by any major structural work you uncovered during the assessment—think reinforcing weary joists, shoring up the foundation, or rebuilding a compromised wall. You have to get the bones right before you can even think about the pretty stuff.
From Rough-Ins to Drywall
With a stable structure, the project shifts into the “rough-in” stage. This is when all the vital systems—the guts of your home—are installed. Electricians will snake wires through the open walls, plumbers will lay the pipe for every sink and shower, and your HVAC team will run the ductwork for heating and cooling. It all happens now, while access is easy.
Once those systems are in place and inspected, insulation is next. This is a critical step, especially in older homes, and makes a huge difference in comfort and energy bills. Only then is it time for drywall. Suddenly, that skeletal frame transforms into actual rooms. It’s a huge visual leap and the first time the space really starts to feel like a home again.
This kind of project is more common than ever. The global home renovation market hit nearly USD 2 trillion in 2024, with a huge portion dedicated to updating the core systems and functionality of older properties. You can dive deeper into these global home renovation trends to see just how many homeowners are on the same journey.
A Quick Tip from Experience: Try to schedule your site visits at the end of a key phase, like after framing is done or once the electrical rough-in is complete. This lets you see the finished work and ask questions without getting in the crew’s way. It keeps you informed and helps you spot potential issues before they get covered up.
Dealing with the Inevitable Change Order
Here’s a hard truth: no matter how meticulously you plan, you’ll probably face a change order. It’s simply a formal document that details a change to the original plan, including the cost and time it will add. It might pop up when a plumber discovers a rotted subfloor hidden under an old vanity, or when you suddenly decide you must have those extra recessed lights in the living room.
The key is to handle them with clear communication. Always, always get a change order in writing. Make sure the cost and schedule impact are spelled out, and don't let the work proceed until you’ve signed off. This is your best defense against "scope creep"—the slow, silent killer of budgets and timelines.
The Finishing Touches: Where the Magic Happens
The final stage is where the personality you’ve been dreaming of really comes through. All those samples and swatches you agonized over finally come together. The work usually follows a specific order to protect new finishes:
- Painting: Walls, ceilings, and trim get their fresh coats of color first.
- Flooring: Next, the hardwood, tile, or carpet goes down.
- Cabinets & Countertops: The kitchen and bathrooms start to look functional as these are set in place.
- Final Fixtures: The last step is installing lights, plumbing fixtures, outlets, and hardware.
This is where you get to blend the new with the old. Maybe you’ll pair a sleek, modern faucet with a vintage-style sink, or run beautifully restored original hardwood floors right up to a state-of-the-art kitchen island. It’s this thoughtful balance that makes renovating an old house so deeply rewarding, leaving you with a space that honors its history while being perfectly tailored to your life today.
Answering Your Top Old House Renovation Questions
Even the most seasoned renovators run into questions when tackling an old house. It’s just the nature of these projects. From figuring out what to save versus what to toss, to just how long you'll be living in a construction zone, let's get into some of the most common questions I hear from homeowners.
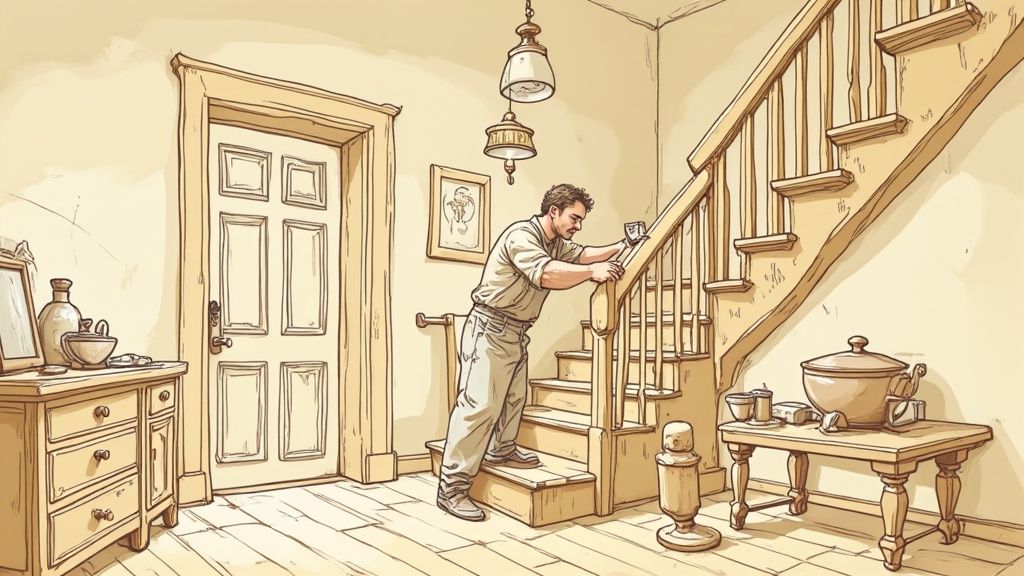
A big one is always about original features. Do you restore them or just replace everything? It's a tough call. Preserving that beautiful, wavy glass in an old window or the intricate scrollwork on a staircase adds character you just can't buy today. But you have to be practical. If those gorgeous hardwood floors are buckled and rotted beyond repair, or that staircase is a lawsuit waiting to happen, replacement is the only safe and sensible option.
That said, always investigate before you demolish. I've seen clients pull up disgusting 70s shag carpet to find stunning, near-perfect oak floors underneath. A little sanding and refinishing, and they had a feature worth thousands. Always check what's hiding.
How Long Does an Old House Renovation Really Take?
This is the million-dollar question, isn't it? And the honest, experienced answer is: it always takes longer than you think. A straightforward kitchen or bath remodel might be done in 4-8 weeks if everything goes perfectly. But a full-gut job? One that involves moving walls, rerouting plumbing, and a full electrical overhaul? You should realistically budget for anywhere from 6 months to over a year.
What throws a wrench in the schedule? It's usually a few key things:
- The Permit Black Hole: Depending on how busy your local building department is, just getting the permits approved can take weeks or, in some cities, months. No work can start until that paper is in hand.
- The Waiting Game for Materials: Those custom-ordered windows or that specific tile you fell in love with? They can have lead times of 12 weeks or more. Order them the second your plans are finalized.
- The "Uh-Oh" Discoveries: This is the big one in old houses. You open up a wall and find termite damage, a cracked foundation beam, or a spaghetti monster of old, unsafe wiring. These discoveries stop the project in its tracks until they're fixed, adding significant time and cost.
The best advice I can give is to build your schedule backward with your contractor. Start with your ideal move-in date and add generous buffers—at least 20-30% more time than the initial estimate—for each phase. Rushing an old house is a recipe for disaster.
Can I Live in the House While We Renovate?
I know it’s tempting. You think you'll save a ton on rent, but living in a major renovation is brutal. I'm talking about a constant film of dust on everything, the scream of power saws at 7 a.m., and weeks without a working kitchen or a private bathroom. For anything more than a single-room cosmetic update, it's not just stressful—it can be unsafe, especially during demolition or asbestos removal.
If you’re just redoing a powder room, you can probably manage. But for a whole-house project, do yourself a massive favor and find a temporary place to live. Your sanity is worth the extra cost. Seriously.
What’s the Secret to Blending Old and New?
Creating a home that feels both historic and modern is where the real magic happens. The key is to make the new elements respect the old ones, not shout over them. You want harmony, not a head-to-head battle between eras.
For example, you can get modern, energy-efficient windows, but choose a style with divided panes that mimics the home's original architectural look. In the kitchen, this could mean pairing sleek, professional-grade appliances with timeless Shaker-style cabinets and a classic apron-front sink.
The goal isn't to create a museum piece stuck in the past. It's to build a home that honors its history while working perfectly for the way you live today. It's that thoughtful balance that makes the whole journey worthwhile.
Ready to find your own renovation project? At mapdomo, we specialize in connecting buyers with unique properties across Japan, including thousands of traditional "akiyas" waiting for a new life. Explore our interactive maps and detailed listings to discover your dream home today.